
How to transfer photos from iPad to Windows 10
The first thing any lucky iOS device owner faces is iTunes, a syncing application and the only way to download media files, photos and books to your iPhone, iPad or iPod. And if Mac users often know and understand this program, then most Windows fans have difficulties at this stage. In addition, users of iOS devices were doomed to tie their gadgets to a single computer and copy all files again, even after a simple reinstallation of the operating system. This raises the question – “Are there other alternatives for transferring files without iTunes?” Definitely yes. In this guide, you will know how to simply transfer files from iPhone/iPad to Windows 10 without iTunes.
Use Automatic Solution to transfer photos from iPad to Laptop
AnyTrans is a program designed to transfer music, videos, applications and other files from your computer to your iPhone, iPod or iPad, and Vice versa. It also allows you to clone devices to transfer data, for example, from an old iPhone to a new one, and perform a number of other operations that are not available in iTunes.

You may use our video guide on how to use AnyTrans to transfer your videos from iPhone/iPad to Laptop:
https://youtu.be/U4luJ_fEl8c
Quick guide to using AnyTrans
- Plug your iPad to your computer using lighinig cable
- Run AnyTrans icon from your desktop and choose device manager
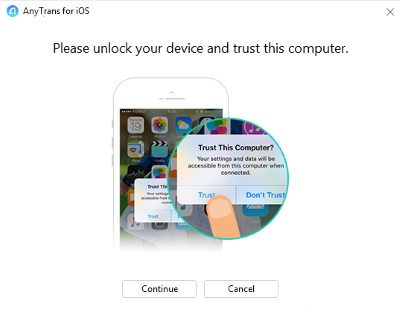
- Anytrans will offer you to tap trust this computer – tap it on your iPad, and press continue button on AnyTrans
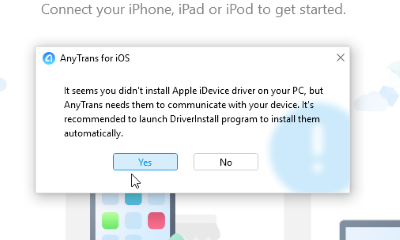
- If you will be offered to download Apple device driver – accept it and then choose Content to Computer
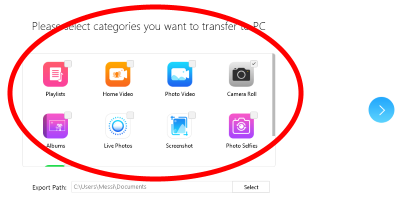
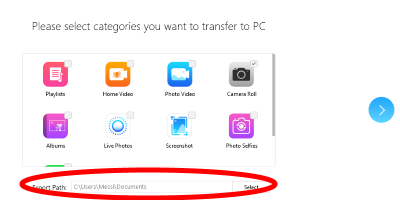
- Mark all types off content, which you want to transfer
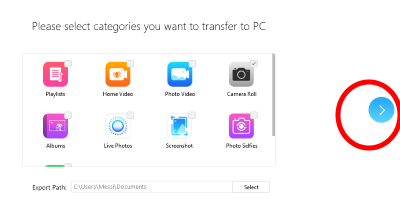
- Choose export path
- Click Next button
AnyTrans supports importing of Camera Roll photos, PhotoStream, Photo Libraries, photos from iTunes, photo albums, etc. When the transferring process will be finished, all your photos from iPad will be saved in the selected folder. Note, that trial version allows to transfer no more than 30 files per day. This solution is suitable for Windows XP/7/8/10.
Transfer photos from iPad to Laptop with iCloud
You may transfer your data by synchronizing photos from your iPad to your laptop/computer through the Apple iCloud feature. To do that, you need to turn on iCloud on your iPad, in case you don’t have this service on:
- Navigate to Settings;
- Click on your phone’s name;
- Choose iCloud;
- Select Photos;
- Now you should turn on iCloud Photo Library.
Once you have finished with iCloud settings, follow these instructions:
- Start iCloud app on your computer (if you don’t have one, you should download from the internet);
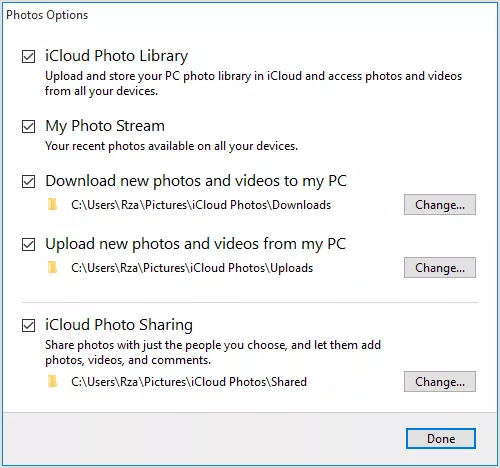
- Select Options next to Photos and turn on iCloud Photo Library;
- Check the Download new photos and videos to my PC feature, see if it is turned on. On this step you may also change the directory of storage folder on your PC. If you need to transfer your photos from Laptop to iPad, tick the box near the Upload new photos and videos from my PC feature;
- Once you have finished, all your iPad photos will be transferred to your Laptop when there is a WiFi connection.
You may also do such transfer online, by using iCloud.com:
- Open iCloud.com on your PC;
- Type in your Apple ID and sign in to iCloud;
- Select Photos feature;
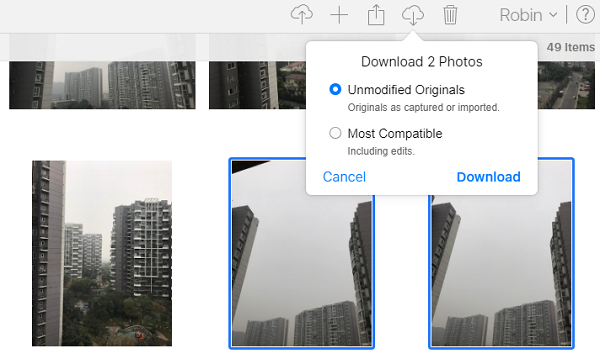
- Choose photos you need to download from iCloud to your PC;
- Click on Download Selected items.
Transfer photos from iPad to Laptop with Windows Files Explorer
This method is one of the simplest, still, we should mention that it will only work if there is installed iTunes.
- Connect your iOS device with PC using a lightining cable.
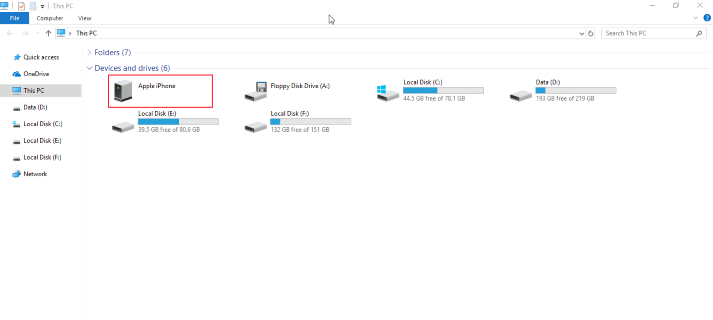
- Open Windows Explorer and double-click iPad’s icon in This PC tab.
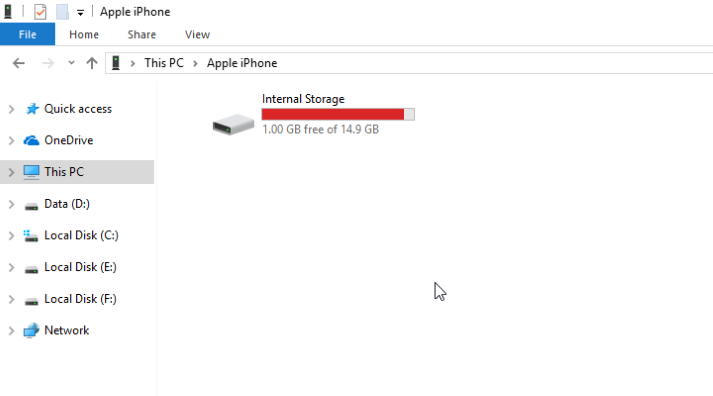
- Open Internal Storage.
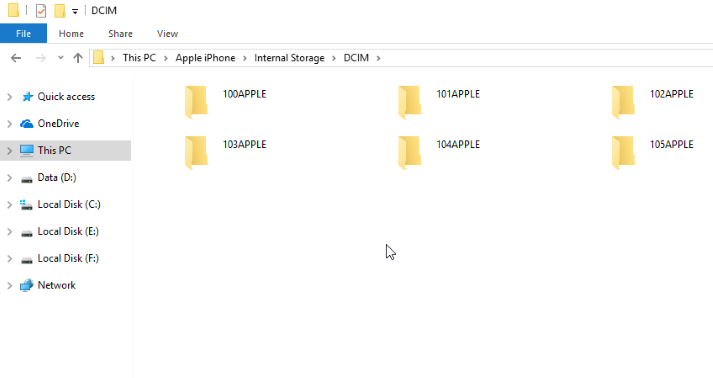
- Open DCIM.
- Here you will see folders that contain images.
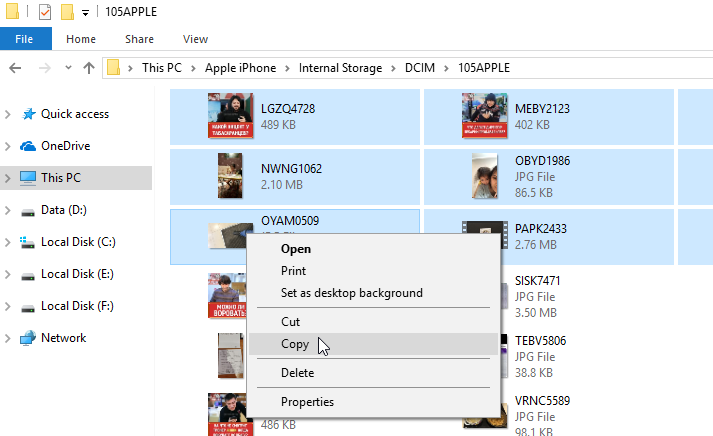
- Select images you want to transfer and copy them to the computer.

Transfer photos from iPad to Laptop with Windows 10 Photos app
Another way is also convenient for users who use Windows 10 operating system. Here we will use the standard Photos app that comes with Windows 10.
- Plug your iOS device into your Windows 10 computer.
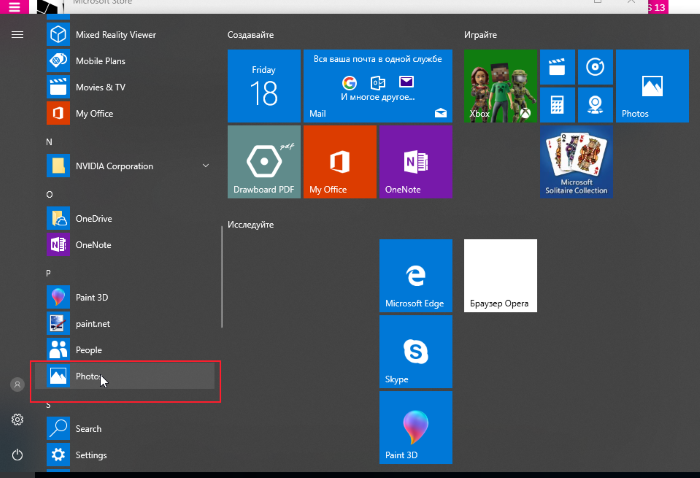
- Open Photos app by clicking the Start menu in bottom left corner of your screen.
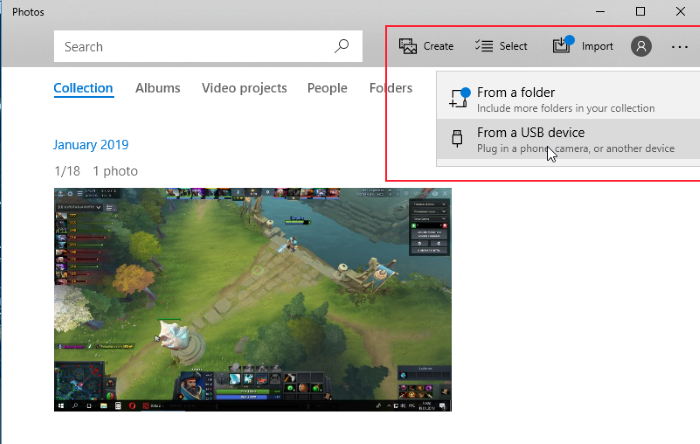
- Click Import in the top-right corner then click From a USB device.
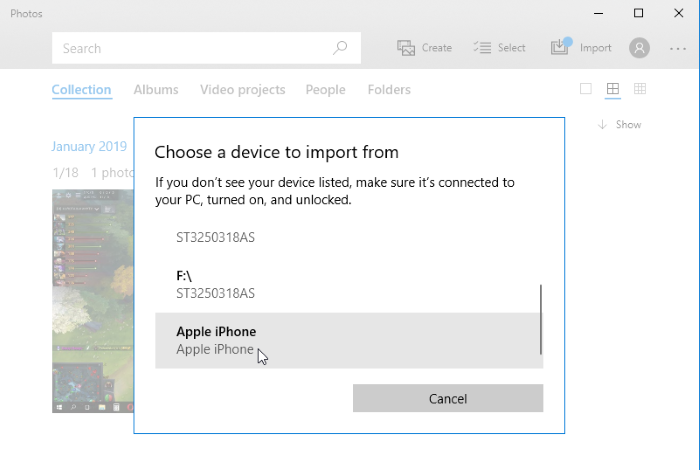
- In the opened window, choose your iOS device.
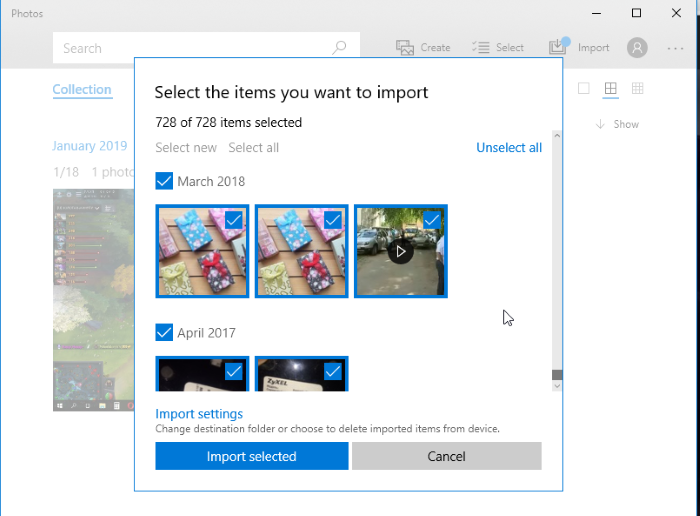
- By default, all found files will be imported to the PC, so you should unselect photos you’d like to not import;
- Click Import Selected to begin the import process.
Thank you for attention! We hope this guide was helpful to you. If you know any other useful methods – feel free to share them in the comment section below.