
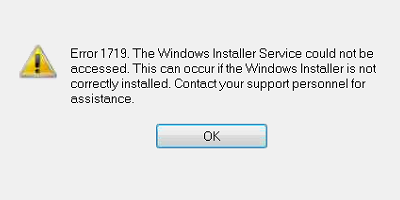
Why did Error 1719 appear in my Windows 10?
Windows Installer is a specific tool intended to install software. Error 1719 (‘Windows Installer service could not be accessed…’) means something’s wrong with this service, and any program with *.msi installation files won’t be able to get installed. This happens ordinarily when the files of Installer are corrupted or missing, or if its settings are configured wrongly. Some error during previous installation, Installer files deleted by mistake or corrupted by a virus can lead to error 1719. Read further if you would like to figure out how to remove code 1719 error in Windows 10.
Fast Automatic Solution:
Easiest way to fix Windows 10 Error 1719 is to use special computer optimizer Advanced System Repair. It will scan your computer for system errors and issues. Advanced System Repair has a wide range of solutions to most of the system problems, including Windows 10 Error Error 1719. Install it and run the scan, then watch it fixing your system’s issues.
Uninstall Windows 10 incompatible programs
Installed applications that are not compatible with Win 10 may be at fault for error 1719 occurrence. Antivirus programs and encryption apps are often at fault here. You can browse the Internet to determine if the versions of software you have installed are Windows 10 compatible. If it turns out that they are not, try uninstalling or updating them and see if this helps you resolve error 1719.
Note: To find version numbers of installed applications, hit Windows key + X, select ‘Control Panel’, then ‘Programs and Features’ or ‘Uninstall a program’, depending on Control Panel settings. Find the the application’s name in the first column, and in the rightmost column you will see its version number.
Start (or stop and restart) Windows Installer
- Hit Windows key.
- Type services.msc and hit Enter.
- In services list find Windows Installer. If its status shows as Running, right-click on it and choose Stop.
- Right-click and select Start.
- See if that removed error 1719 in Windows 10.
Re-register Windows Installer
- Hit Windows key, then type cmd.
- Find cmd among several entries that will appear, right-click on it and select ‘Run as administrator’.
- Enter administrator password should you be asked to do it.
- Command prompt window will pop up. Copy and paste the following commands into it one by one. Press Enter after every one.
Note: To find what Windows version you have (32-bit or 64-bit), press Windows key + Pause/Break key and look up System type in the window that will show up.If you have 32-bit Windows:
msiexec /unregister
msiexec /registerIf you have 64-bit Windows:
%windir%\system32\msiexec.exe /unregister
%windir%\system32\msiexec.exe /regserver
%windir%\syswow64\msiexec.exe /unregister
%windir%\syswow64\msiexec.exe /regserver - Restart your computer and see if that resolved error 1719.
Run System File Checker
System File Checker is designed to detect faulty or missing system files and restore them. In some cases for the files to be restored you might be asked to insert your Windows installation disk.
- Press Windows key and type cmd.
- Find and right-click cmd entry, select ‘Run as administrator’.
- Enter administrator password should you be prompted.
- Copy and paste the following command:
sfc /scannow - Wait for the process to complete. If the command won’t run, or System File Checker is unable to repair corrupt files, copy and paste the command:
DISM /Online /Cleanup-Image /RestoreHealth
Hit Enter and wait for the process to finish (this will take several minutes). Then repeat Step 4. - Restart the computer and check if this helped to get rid of 1719 error in your Windows 10.