
What is CTB-locker?
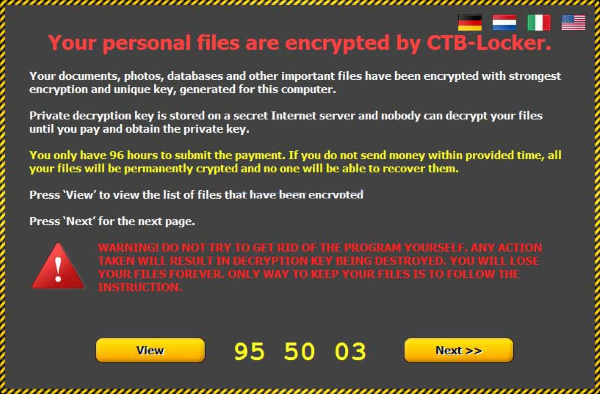
If you’re seeing the original extension of your files was changed to .ctb and .ctb2, that means the system is being infected with CTB-locker. CTB-locker is a ransomware which decrypts data on the victim’s computer. It uses RSA-2048 encryption, making it virtually impossible to restore files without special key. It is mentioned in note contained in three files: AllFilesAreLocked.bmp, DecryptAllFiles.txt and randomly named HTML file. Crooks also demands a ransom at a rate of .3 Bitcoins (~300$) to decrypt files. Moreover, you have only 96 hours to submit payment, otherwise the data will be lost permanently. Experience shows that victims are ignored even after the payment is done. Consequently, you should not to submit to this kind of blackmail. In this article we will tell you how to remove CTB-locker and show some ways to decrypt .ctb and .ctb2 files.

To prevent suсh kinds of the threats as CTB-locker ransomware in the future follow these tips:
- Adjust your email anti-spam settings to filter out all the potentially unsafe incoming messages.
- Make sure, the attachments with the following extensions: .js, .vbs, .docm, .hta, .exe, .cmd, .scr, and .bat. place in the black list
- Rename the vssadmin.exe process to protect Shadow Volume Copies of your files from removal.
- Raise the level of protection of your Firewall. It can prevent ransomware from connecting with its server.
- Do not forget to backup your files regularly. This will facilitate process of decrypting files in case of infection.
- Install antimalware tool because it can detect ransomware in advance and remove the malware before the infection.
How CTB-locker infects your PC?
CTB-locker ransomware infiltrates your system by means of phishing. Ordinarily, cybercriminals distribute their product via spam emails with fake header information that might inspire trust like Amazon, DHL or FedEx. Most of these emails are disguised themselves as invoices, scanned documents from office, bills, information about failed payment. In this way, the forged messages are attached with the malicious archive containing this dreadful virus. Inside the archive, mainly ZIP archive, is malicious file. It also can get into your system through fake software updates, torrent (P2P) networks, and trojans.
After finishing infiltrating process, CTB-locker take following steps:
- CTB-locker make a connection with its Command and Control server in order to receive configuration data and other information about your computer.
- CTB-locker changes your computer’s settings to make it run automatically whenever Windows starts up.
- CTB-locker is seeking for certain type of data and encrypting it with it’s advanced encryption algorithm.
How to remove CTB-locker from your computer?
In order to get rid of CTB-locker on your computer, first thing you need to do is to run PC through full scan of some proper anti-virus program. To do so, take following steps:
- Boot your computer in Safe Mode with networking – push F8 button before your system starts;
- You’ll see Advanced boot options menu;
- Select Safe mode with networking and press Enter;
- Once you’ve entered your system in Safe Mode with networking, open your web browser and download any proper and reliable anti-malware program (like SpyHunter);
- Start entire system scan;
- After finishing scanning process, the program will remove virus from your computer.
The best and easiest way to remove CTB-locker from your computer is to use special anti-malware program that has this threat in its database. As stated above, you need proper and reliable anti-malware program, that’s why we recommend you to use SpyHunter.
It scans your computer and detects various threats like CTB-locker, then completely removes it. One of the best features of this program – large threat’s database. SpyHunter’s newly advanced ransomware detection technology is able to run an instant ransomware scan and show you a message about detection. After deep scanning of your system, it will easily find and delete CTB-locker. Use this removal tool to get rid of CTB-locker for FREE.

How to decrypt .ctb and .ctb2 files encrypted by CTB-locker?
Once you’ve removed virus, you are probably thinking of recovering files from encryption. Let’s take a look at possible ways of decrypting your data.
Decrypt .ctb and .ctb2 files with automated decryption tools
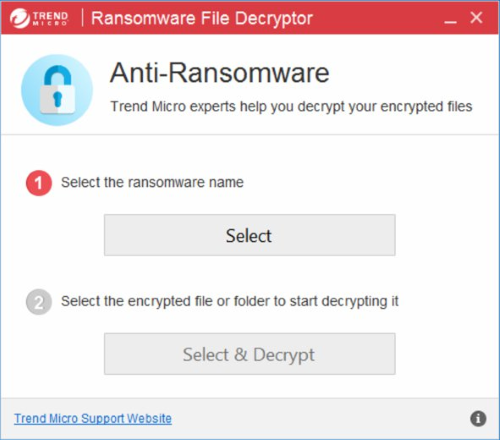
You can try to use automated decryption tool like Ransomware File Decryptor developed by Trend Micro. It may decrypt infected with CTB-locker files and it is free to use, so give it a try.
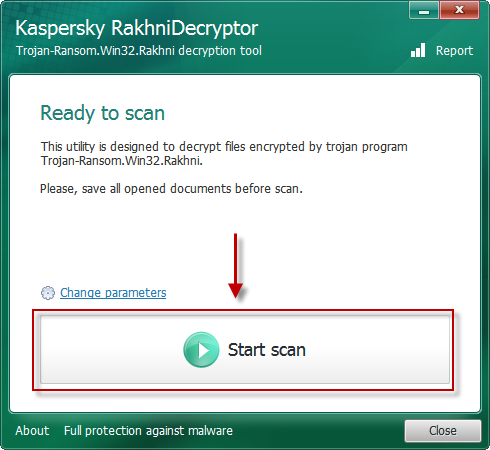
There is another possible solution to decrypt .ctb and .ctb2 files, use Kaspersky RakhniTool.
Decrypt .ctb and .ctb2 files manually
You can try to use one of these methods in order to restore your encrypted data manually.
Restore data with Windows Previous Versions
This feature is working on Windows Vista (not Home version), Windows 7 and later versions. Windows saves copies of files and folders which you can use to restore data on your computer. In order to restore data from Windows Backup, take following steps:
- Open My Computer and search for the folders you want to restore;
- Right-click on the folder and choose Restore previous versions option;
- The option will show you the list of all the previous copies of the folder;
- Select restore date and the option you need: Open, Copy and Restore.
Restore the system with System Restore
You can always try to use System Restore in order to roll back your system to its condition before infection infiltration. All the Windows versions include this option.
- Type restore in the Search tool;
- Click on the result;
- Choose restore point before the infection infiltration;
- Follow the on-screen instructions.
Restore data with Shadow Explorer
Shadow Explorer is an application that is able to provide you with Shadow Copies created by the Windows Volume Shadow Copy Service.
- Once you’ve downloaded this application, open a folder with it;
- Right-click on the file ShadowExplorer-0.9-portable and choose Extract all option;
- Run ShadowExplorerPortable.exe;
- Look at the left corner, there you can choose desired hard drive and latest restore option;
- On the right side you can see the list of files. Choose any file, right-click on it and select Export option.
Restore data with Recuva
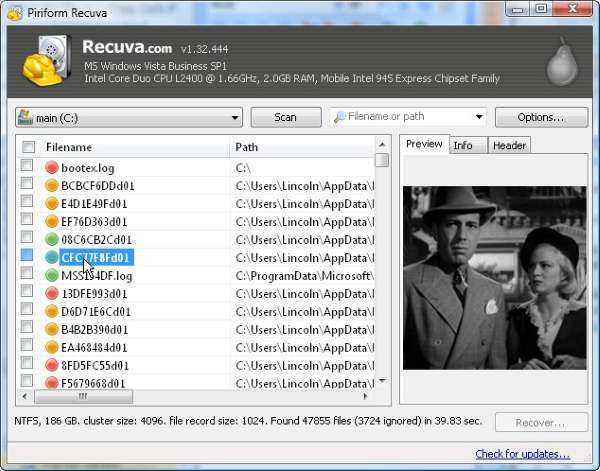
Recuva is a data recovery program for Windows, developed by Piriform. It is able to recover files that have been “permanently” deleted and marked by the operating system as free space.
- Once you’ve downloaded and installed this application, start it in Wizard mode: choose the Options button and then select Run Wizard;
- You will see Welcome to the Recuva Wizard page, choose Next;
- Open the File Type page and choose the type of data you need to recover, after select Next. If you don’t know what kind of data you are looking for, choose Other option;
- Choose the location of a search in the File Location window;
- In the Thank you window, select Start. After finishing searching process, Recuva will show you the results of search;
- Before recovering of the data, choose the Check Boxes near the file. You can see three types of colored dots. Green dot means that your chance to restore file is excellent. Orange one – chance to restore file is acceptable. And the red one shows you that it’s unlikely to happen;
- Select Recover option and choose the directory of the restored data.