
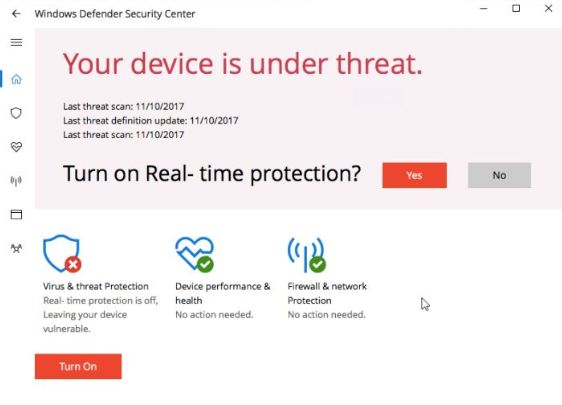
What is “Your Device is Under Threat” pop-up?
“Your Device is Under Threat” pop-up is a fake alert that might pop up on your computer screen on occasion after penetration PUP (potentially unwanted program). Keep in mind that it’s just a trick and there is actually no problem with your system, therefore, you should ignore this message. In this case, by intimidating users, cybercriminals encourage people to install ad-supported programs. Other negative factors include a sharp decline in computer performance, huge amount of banner ads, redirects to commercial sites, сhange your home page, new tab, search engine. Please follow these steps to completely remove “Your Device is Under Threat” from your computer.

How “Your Device is Under Threat” pop-up infects your PC?
As stated earlier, “Your Device is Under Threat” Pop-up appears due to the presence of malicious program on your computer. It, in turn, crawls into the system without anybody noticing. Most often, it is just a part of installation package of other program that you have installed. This method is called – bundling. To prevent it, you should select “Custom” or “Advanced” settings within installation process. Just uncheck unwanted programs to weed out them. The hijacker also may get into your system after visiting any suspicious websites. Hackers exploit security holes in the computer to distribute their products. Therefore, you should be very careful when browsing. The powerful anti-malware program also wouldn’t go amiss.
How to remove “Your Device is Under Threat” pop-up from your computer?
The best and easiest way to remove “Your Device is Under Threat” pop-up from your computer is to use special anti-malware program that has this threat in its database. The program is fully automated, all you need to do is to download and install it. Once you’ve installed anti-malware application, it will scan your system and remove all the threats.
It scans your computer and detects various threats like “Your Device is Under Threat” pop-up, then removes it with all of the related malicious files, folders and registry keys. After deep scanning of your system, it will easily find and delete “Your Device is Under Threat” pop-up. Use this removal tool to get rid of “Your Device is Under Threat” pop-up for FREE.


Norton 360 Antimalware – this program will help you to get rid of “Your Device is Under Threat” pop-up. It can find malicious program that is corrupting your system and clean up junk files after removal.
How to remove “Your Device is Under Threat” pop-up manually
Step 1: Remove “Your Device is Under Threat” pop-up from Control Panel
In order to get rid of “Your Device is Under Threat” pop-up, first thing you need to do is to uninstall malicious program from your computer. When removing “Your Device is Under Threat” pop-up, try to find suspicious recently installed programs and delete them too, as it’s pretty common that any malware comes with some other unwanted programs.
Windows XP:
- Select Start.
- Control Panel.
- Then choose Add or Remove Programs.
- Search for program related to “Your Device is Under Threat” pop-up.
- Click Uninstall.
Windows 7/Windows Vista:
- Select Start.
- Then Control Panel.
- Choose Uninstall a Program.
- Find program related to “Your Device is Under Threat” pop-up and choose Uninstall.
Windows 8/Windows 8.1:
- Open the Menu.
- Select Search.
- After that choose Apps.
- Next Control Panel.
- Then as in Windows 7, click Uninstall a Program under Programs.
- Find program related to “Your Device is Under Threat” pop-up, select it and choose Uninstall.
Windows 10:
- Click on the Start button (or press the Windows key) to open the Start menu, then select Settings at the top.
- Choose App & features on the left menu.
- On the right side, find program related to “Your Device is Under Threat” pop-up and select it, then click on the Uninstall button.
- Click on Uninstall to confirm.
Note: If you can’t find required program, sort programs by date in Control panel and search for suspicious recently installed programs.
Step 2: Remove “Your Device is Under Threat” pop-up from browsers
Once you’ve uninstalled the application, remove “Your Device is Under Threat” pop-up from your web browser. You need to search for recently-installed suspicious add-ons and extensions.
Google Chrome:
- Open Google Chrome
- Push Alt + F.
- Choose Tools.
- Select Extensions.
- Search for program related to “Your Device is Under Threat” pop-up.
- Select the trash can icon to remove it.
Mozilla Firefox:
- Open Firefox.
- Push Shift + Ctrl + A.
- Select program related to “Your Device is Under Threat” pop-up.
- Choose Disable or Remove option.
Internet Explorer:
- Open IE.
- Push Alt + T.
- Choose Manage Add-ons option.
- Click Toolbars and Extensions.
- Next select program related to Disable “Your Device is Under Threat” pop-up.
- Choose More information link in the left-bottom corner.
- Click Remove button.
- If this button is grayed out – perform alternative steps.
Step 3: Removing malicious link from your browser shortcuts
Sometimes even removing of malicious program from your computer and web browser can’t help. If you are still facing unknown webpage when you open web browser, then you might have your browser shortcut changed. It’s pretty common trick that performs most of browser hijackers. They change your browser shortcut so that every time you open it you’ll see not your homepage, but some advertisement webpage. But this issue is quite simple to fix. The instruction stated below matches most of the browsers.
- Right-click on your browser shortcut, choose Properties.
- If you see a link to some website after .exe in the Target field, read on.
- Usually you are not able to delete a link from Target field, that’s why you need to click on the Open File Location button in this window.
- Once you’ve opened file location, select chrome.exe/firefox.exe/iexplore.exe.
- Right-click on this file and choose Sent to option, then Desktop (create shortcut).
- New shortcut will have no additional redirection links.
- Delete old infected shortcut. If you got one in your taskbar, delete it from there too.
- Now you have new and clear shortcut without redirection to unknown websites.
Step 4: Resetting your browser search and homepage settings
To be sure that there is nothing left behind, we recommend you to reset your browser. It will restore your browser settings to default.
Reset browser settings in Google Chrome:
- Click the Chrome menu (3 bar button) in the top right corner.
- Choose Settings.
- Click Show advanced settings.
- Go to Reset browser settings section.
- Click Reset browser settings.
- In the dialog that appears, click Reset.
Reset browser settings in Mozilla Firefox:
- Open Mozilla Firefox.
- Go to Help.
- Go to Troubleshooting information.
- Click Reset Firefox… button.
Reset browser settings in Internet Explorer:
- Open Internet Explorer.
- Click on the cogwheel in the right upper corner.
- Click Internet options.
- Got to Advanced tab.
- Click Reset button.
- Put a tick near Delete personal settings checkbox.
- Click Reset button.