
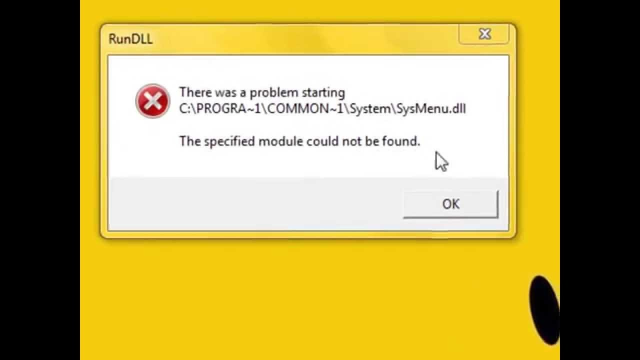
What is RunDLL Sysmenu.dll error
Some Windows 10 users can face RunDLL Sysmenu.dll error. The issue, in the form of pop-up message, occurs when Windows is starting. Let’s try to figure out what is the RunDLL Sysmenu.dll error. Well, it is not the system error. Actually, Sysmenu.dll error is just a part of malicious adware, which means, from now on, a lot of intrusive ads will be displayed on every webpage you visited. Mainly, the information produced by such ad is related to discount coupons. For example, each visiting of the online store, like Amazon, will be accompanied by diverse banners with discount coupons and competitive prices. The malware also promotes the installation of suspicious applications from third-party companies and the developers thus can generate pay-per-click revenue. The situation becomes even more serious since the detection ratio of the infection is very slow, though some antivirus software identify RunDLL SysMenu.dll as malware. But you don’t have to worry in case of infection since this article are specifically created to help you fix RunDLL Sysmenu.dll error.

How RunDLL SysMenu.dll error gets on my computer?
RunDLL Sysmenu.dll error crawls into your system using a pretty sneaky marketing method called “bundling” where the installation goes in stealth mode. This is especially true for free software. Ordinarily, the application is hidden within the “Custom/Advanced” section of the download/installation processes. To prevent your computer from infection we recommend you to be careful and never rush when you install the software. Always opt for the “Custom/Advanced” settings and never agree to install additional unnecessary programs.
How to fix RunDLL Sysmenu.dll error
Easiest way to fix RunDLL Sysmenu.dll error is to use special computer optimizer Advanced System Repair. It will scan your computer for system errors and issues. Advanced System Repair has wide range of solutions to most of the system problems, including RunDLL Sysmenu.dll error. Install it and run the scan, then watch it fixing your system’s issues.
In order to fix RunDLL Sysmenu.dll error manually, you should perform following steps:
How to remove RunDLL Sysmenu.dll error manually
Step 1: Remove RunDLL Sysmenu.dll error from Control Panel
In order to get rid of RunDLL Sysmenu.dll error, first thing you need to do is to uninstall malicious program from your computer. When removing RunDLL Sysmenu.dll error, try to find suspicious recently installed programs and delete them, as it’s always a part of other program.
Windows 10:
- Click on the Start button (or press the Windows key) to open the Start menu, then select Settings at the top.
- Choose App & features on the left menu.
- On the right side, find the program related to RunDLL Sysmenu.dll error and select it, then click on the Uninstall button.
- Click on Uninstall to confirm.
Note: If you can’t find required program, sort programs by date in Control panel and search for suspicious recently installed programs.
Step 2: Remove RunDLL Sysmenu.dll error from browsers
Once you’ve uninstalled the application, remove RunDLL Sysmenu.dll error from your web browser. You need to search for recently-installed suspicious add-ons and extensions.
Google Chrome:
- Open Google Chrome
- Push Alt + F.
- Choose Tools.
- Select Extensions.
- Search for the program related to RunDLL Sysmenu.dll error.
- Select the trash can icon to remove it.
Mozilla Firefox:
- Open Firefox.
- Push Shift + Ctrl + A.
- Select the program related to RunDLL Sysmenu.dll error.
- Choose Disable or Remove option.
Internet Explorer:
- Open IE.
- Push Alt + T.
- Choose Manage Add-ons option.
- Click Toolbars and Extensions.
- Next select Disablethe program related to RunDLL Sysmenu.dll error.
- Choose More information link in the left-bottom corner.
- Click Remove button.
- If this button is grayed out – perform alternative steps.
Step 3: Resetting your browser search and homepage settings
To be sure that there is nothing left behind, we recommend you to reset your browser. It will restore your browser settings to default.
Reset browser settings in Google Chrome:
- Click the Chrome menu (3 bar button) in the top right corner.
- Choose Settings.
- Click Show advanced settings.
- Go to Reset browser settings section.
- Click Reset browser settings.
- In the dialog that appears, click Reset.
Reset browser settings in Mozilla Firefox:
- Open Mozilla Firefox.
- Go to Help.
- Go to Troubleshooting information.
- Click Reset Firefox… button.
Reset browser settings in Internet Explorer:
- Open Internet Explorer.
- Click on the cogwheel in the right upper corner.
- Click Internet options.
- Got to Advanced tab.
- Click Reset button.
- Put a tick near Delete personal settings checkbox.
- Click Reset button.
Step 4: Removing malicious link from your browser shortcuts
Sometimes even removing of malicious program from your computer and web browser can’t help. If you are still facing unknown webpage when you open your web browser, then you might have your browser shortcut changed. It’s pretty common trick that perform most of browser hijackers. They change your browser shortcut so that every time you open it you’ll see not your homepage, but some advertisement webpage. But this issue is quite simple to fix. The instruction stated below matches most of the browsers.
- Right-click on your browser shortcut, choose Properties.
- If you see a link to some website after .exe in the Target field, read on.
- Usually you are not able to delete a link from Target field, that’s why you need to click on the Open File Location button in this window.
- Once you’ve opened file location, select chrome.exe/firefox.exe/iexplore.exe.
- Right-click on this file and choose Sent to option, then Desktop (create shortcut).
- New shortcut will have no additional redirection links.
- Delete old infected shortcut. If you got one in your taskbar, delete it from there too.
- Now you have new and clear shortcut without redirection to unknown websites.