
How to fix DNSAPI.dll error
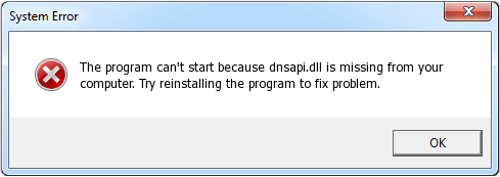
DNSAPI.dll is a system file that’s used by the Windows “DNS Client” API. Put simply, it’s a file that helps to route Internet traffic to the correct addresses, and it is used every time when you surf the Internet. DNSAPI.dll is a shared file and exists as a Windows component. Despite the fact that it provides many benefits for program developers, this separation also could cause problems. DNSAPI.dll error message appears when your computer is started and when your program is launched. DNSAPI.dll is also often under attack by cybercriminals due to its vulnerability.

DNSAPI.dll error can be caused the following:
- Damaged dnsapi.dll registry entry.
- Malware infection has damaged the dnsapi.dll file.
- Some program deleted the dnsapi.dll file.
How to fix DNSAPI.dll error
We want to make it clear that performing this step might require advanced computer skills. The simplest way of dealing with the problem would be to use a special tool. One of the best is Advanced System Repair. It will not only save your time doing the job instead of you but also clean and optimize your system to increase performance.
In order to fix DNSAPI.dll error, you should perform one of these troubleshooting steps:Step 1: Fix the DNSAPI.dll error using Microsoft Register Server
- Click the Start button.
- Type “command” in the search box
- Press CTRL-Shift key combination and press ENTER.
- Click Yes in the next dialog box
- Type command: regsvr32 /u dnsapi.dll.
- Press ENTER to unregister dnsapi.dll.
- Type command: regsvr32 /i dnsapi.dll.
- Press ENTER to register dnsapi.dll again.
- Close the window.
Step 2: Fix the DNSAPI.dll error using System Restore
System Restore (Windows XP, Vista, 7, 8, and 10):
- Click the Start button on the left-bottom corner.
- Select the search box and type: System Restore. Then press ENTER.
- Choose a required restore point.
- Restore your computer.
Step 3: Remove and reinstall the program related to DNSAPI.dll
If your DNSAPI.dll error is related to a specific program, reinstalling MSDN Disc 2466-related software could be the answer.
Windows 7/Windows Vista:
- Click Start button and select Control Panel.
- Open Programs and Features.
- Try to find program related to dnsapi.dll (eg. MSDN Disc 4616.01).
- Select this program and click the Uninstall button on the top menu.
Windows XP:
- Click Start button and select Control Panel
- Open Add or Remove Programs.
- Try to find program related to dnsapi.dll (eg. MSDN Disc 4616.01).
- Select this program and click the Remove button on the right side of window .
Windows 8/Windows 8.1:
- Move the cursor in the let bottom of the screen to display the Start Menu image.
- Right-Click to bring up the Start Context Menu.
- Open Programs and Features.
- Try to find program related to dnsapi.dll (eg. MSDN Disc 4616.01).
- Select this program and click the Uninstall button on the top menu.
Windows 10:
- Click on the Start button (or press the Windows key) to open the Start menu, then select Settings at the top.
- Choose App & features on the left menu.
- On the right side, find program related to dnsapi.dll (eg. MSDN Disc 4616.01) and select it, then click on the Uninstall button.
- Click on Uninstall to confirm.
After this, you should reinstall the program according to the Microsoft instructions.
Step 4: Fix the DNSAPI.dll error using Windows System File Checker
To run System File Checker (Windows XP, Vista, 7, 8, and 10):
- Click the Start button on left-bottom corner.
- Type “command” in the search box…
- Press CTRL+Shift simultaneously and then press ENTER.
- Click Yes in the opened dialog box
- Type “sfc /scannow” and press ENTER.
- System File Checker will start scanning for any system file problems
Step 5: Check and install updates for Windows
To check for Windows Updates (Windows XP, Vista, 7, 8, and 10):
- Click the Start button.
- In the search box, type “update” and press ENTER.
- The Windows Update dialog box will appear.
- Click the Install Updates button if updates are available.